Benefits of Interlocking Rubber Tiles for Garage
Enhanced Durability and Impact Resistance
Your garage floor has witnessed terrible things. Dropped spanners, runaway trolley jacks, and that one engine block you swore you’d lift properly. Bare concrete cracks under such abuse. Interlocking rubber tiles for garage surfaces absorb the punishment instead. They flex, they rebound, and they shrug off impacts that would leave permanent craters in cement.
The secret lies in their dense rubber composition. When a heavy tool slips from your grip, the tile deforms slightly and then springs back. No chip, no dent, no angry crack running across the floor.
– No cracking from thermal shifts
– No chipping from sharp metal edges
– No permanent deformation from parked vehicles
These tiles also handle repeated stress from creepers and jacks without wearing thin. Your floor stays smooth while your knees quietly thank you.
Comfort and Ergonomics Underfoot
Standing on concrete for hours is taxing. Your knees, hips, and lower back absorb the load until they ache. Interlocking rubber tiles for garage floors change that dynamic. The material compresses by fractions of a millimetre, absorbing shock with every step. This translates directly into reduced fatigue.
I have watched home mechanics in Durban install these tiles primarily for this benefit. The cushioning effect is noticeable yet unobtrusive.
- Decreases joint strain.
- Provides stable grip under oily work boots.
- Offers insulation from cold concrete.
That insulation becomes vital in winter. Rubber does not drain heat from your feet the way cement does. It simply maintains a more practical surface temperature.
Chemical and Stain Resistance
A garage floor reveals more about a person than their coffee order. Oil drips, battery acid splashes, and spilled coolant have ended many a pristine concrete surface. That is where interlocking rubber tiles for garage become essential. These tiles shrug off hydrocarbons and solvents. Brake fluid beads up. Motor oil wipes away with a cloth. I have seen a Durban mechanic drizzle differential oil across his tiles, then mop it clean without a trace. The surface does not absorb, it repels. This matters when your workshop doubles as a social space and you do not want guests wading through petrochemical souvenirs.
- Engine oil leaves no shadow.
- Battery acid does not etch.
- Paint thinner evaporates without marring.
The stain resistance of interlocking rubber tiles for garage also protects against rust droplets and tire marks. Your garage becomes presentable, even after a weekend of honest labor.
Easy Installation and Portability
Permanent changes to a rented home are rarely worth the trouble. Interlocking rubber tiles for garage require no glue, no bolts, and no permanent alteration to the surface below. You lay each tile, lock the edges together, and the floor is ready the same day.
Portability gives these tiles an advantage over poured coatings or glued vinyl. If you move from Durban to Pretoria, the floor can move with you. Pull the tiles apart, stack them in a trailer, and reinstall them at the new property. That is the value of a modular system!
- Tool-free installation: each tile clicks into place by hand
- Relocatable: the full floor lifts and re-lays without losing shape
- Zero drying time: no waiting for adhesives to cure before use
Noise Reduction and Insulation Properties
A garage floor is often an afterthought, yet it transmits more noise than any wall in the house. The rumble of a car engine, the clatter of tools, or the thud of a closing door resonates through concrete and into the living areas above. Interlocking rubber tiles for garage surfaces interrupt that transmission path. The dense, elastic material absorbs vibrational energy rather than reflecting it. This is not soundproofing, but it is a significant reduction in impact noise and airborne clatter.
Thermal insulation is the quieter advantage. A concrete slab in a Johannesburg winter turns a workspace into a cold storage unit. Rubber acts as a thermal break between the cold ground and your feet, as well as your vehicle’s tyres. This property also works in reverse, keeping the floor cooler during Highveld summer afternoons.
– The tiles reduce echo and reverberation within the space.
– They provide a warmer surface for kneeling or working.
– They prevent cold from radiating through the slab.
These properties are physical, not anecdotal. You are adding a layer of mass and density that changes how the room feels, not just how it looks. In a country where load shedding often leaves garages used as workspaces longer than usual, that added comfort is measurable.
Key Factors to Consider When Selecting Garage Tiles
Thickness and Density Ratings
Thickness and density ratings quietly dictate whether interlocking rubber tiles for garage will hold their shape after years of parked vehicles. A thicker tile does not automatically mean a better tile. In fact, density matters more in many cases! Lower density rubber compresses unevenly and leaves permanent dents. The South African climate adds stress, with thermal expansion causing thinner tiles to buckle.
- 12mm suits heavier bakkies or repeated jacking
- 10mm balances cost and resilience for daily parking
- 8mm works only for storage or foot traffic
Density ratings, expressed in kilograms per cubic metre, reveal how tightly the rubber granules are packed. From experience, a rating below 500 kg/m³ signals airy foam that collapses under concentrated loads. Above 700 kg/m³, you get a solid, stable surface. Inspect the manufacturer’s spec sheet rather than trusting a sample. The numbers tell you what the visual surface cannot.
Surface Texture and Traction
After a Highveld thunderstorm, the garage floor turns slick. Smooth concrete offers no forgiveness, and a hurried step can end in a bruised hip. Surface texture decides whether interlocking rubber tiles for garage spaces become a safety asset or a liability.
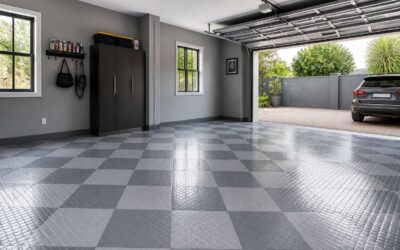
The best tiles feature a raised diamond or waffle pattern that channels water away while keeping boot soles in firm contact. Pegged knobs provide grip for feet, but treads that are too aggressive trap dirt and make cleaning a chore. I look for a texture that balances friction with easy maintenance:
- Shallow ribs offer reliable traction without collecting sand.
- Dimpled surfaces reduce noise while still gripping wet footwear.
A palm pressed onto the tile reveals everything in ten seconds. If it grabs rather than glides, the interlocking rubber tiles for garage will do the same for a tyre or shoe.
Interlocking Mechanism Quality
The interlocking mechanism determines whether a floor stays unified or slowly unravels. A weak edge will show itself within months, with gaps appearing at the joints. For interlocking rubber tiles for garage floors, the connector quality matters most.
Inspect the lug and groove profile before purchase. Tiles with tapered lugs slide together easily. Straight-edged connectors demand force and often spring apart during thermal cycling. A precision-milled edge creates a seam you barely feel underfoot.
- Check that connectors are reinforced with a solid backing layer.
- Test how firmly two tiles hold when pulled from opposite corners.
- Look for tiles that allow partial disassembly without breaking the tab.
The best systems use a dual locking arrangement. One pin holds vertical stability and another controls lateral tension. This design prevents the creeping separation that affects cheaper products.
Size and Color Options
Choosing the correct dimensions transforms a garage from a mere storage shell into a purposeful workspace. Most interlocking rubber tiles for garage floors arrive in 50 cm or 100 cm squares. Measure your floor’s width and length in metres, then calculate how many full tiles fit without cutting. A 100 cm tile covers more area quickly, but a 50 cm tile handles non standard perimeters and awkward bays far better. I always recommend buying 5 percent extra, and I mean always!
Colour is not cosmetic; it dictates how you perceive the space. Light grey reflects the harsh South African sun through windows, reducing the need for additional lighting. Dark tiles hide oil streaks but show every speck of dust. Consider these options:
- Charcoal for machinery bays.
- Steel blue for workshop zones.
- Red for high traffic lanes.
The best interlocking rubber tiles for garage floors balance practicality with atmosphere. Select a colour that matches your storage racks and a size that respects your dimensions. That is what separates a serviceable floor from an inspiring one.
Step-by-Step Installation Guide
Preparing the Garage Floor Surface
I have seen garage tile installations fail because the floor was treated as a secondary concern. Concrete accumulates tyre residue, oil weepage, and a fine layer of construction dust. South African humidity adds efflorescence to the surface. Ignoring these contaminants creates a brittle interface that shifts under vehicle weight.
- Sweep the entire slab, then inspect for oil stains.
- Scrub stubborn marks with a degreaser, letting the concrete dry completely.
- Fill cracks with a repair compound and trowel it flush.
Run your palm across the floor to locate flaking paint or crumbling screed. Grind these areas to expose a stable base. A morning of preparation ensures your interlocking rubber tiles for garage lay flat with no rocking edges.
Acclimating the Tiles to Room Temperature
Homeowners often overlook the quiet rebellion of temperature. A tile delivered from a cold storage warehouse carries its own climate into your garage. When you lay these interlocking rubber tiles for garage straight from the box in the Highveld winter, the material stays stiff and resistant to your pressure.
Give the tiles time to breathe. Stack them loosely in the centre of the room with spacers between layers. This simple act allows the rubber to release its chill and reach a neutral state. You will notice the difference in flexibility and how easily the edges align.
1. Remove the tiles from their packaging and separate them into small piles.
2. Leave the piles spread across the garage floor for 24 hours.
3. Flip each tile once after the first 12 hours to expose both faces.
A rigid tile fights your interlocking mechanism. A tile that has acclimated settles into place with a satisfying click. The difference is subtle but critical when you are working across a large surface. Warmth is not required, just consistent ambient room temperature. Patience here saves you from the frustration of crooked seams later.
Starting the Installation from a Corner
The corner is where most installations go wrong. Begin at the corner farthest from the entry point to anchor the grid and keep foot traffic off fresh sections. Position the first tile with its lugs facing outward, then press until the edges sit flush against both walls.
Work outward in a staggered pattern, offsetting each row. Every interlocking rubber tile for garage snaps into place with a distinct click. I always tell clients to trust that click, but verify it first. Before committing, check two things:
- The tile lies flat with no corner lifted.
- The lugs align squarely with the receiving slots.
If the tile resists, lift it and realign. Forcing a misaligned lug creates gaps that travel across the entire surface. Small corrections at the corner save you from crooked seams later.
Handling Uneven Edges and Trimming Tiles
Garage walls rarely meet the floor at perfect right angles. When the final row meets an uneven edge, the interlocking rubber tiles for garage require careful trimming. Measure the gap at multiple points along the wall, since the distance can shift by a centimeter or more.
Transfer those measurements to the tile surface. Use a straightedge and a sharp utility knife to score the backing, then bend the tile along the cut. For curves or protruding mortar, trace the irregular shape directly onto the tile. Cut slowly and test the fit before locking it into place.
- Mark the cut line with a grease pencil.
- Score three times for a clean break.
- Trim small increments to avoid overshooting.
After trimming, the interlocking rubber tiles for garage still snap into the adjacent row. Match the cut edge against the wall, leaving a slight expansion gap. This approach keeps the surface anchored without forcing the tile to follow every flaw in the concrete.
Securing Tiles Along Walls and Doorways
Doorways are where most garage flooring installations quietly fail. The threshold endures constant compression from vehicle weight, and a tile forced flush against the frame will eventually buckle. Measure the clearance at the jamb and leave a deliberate gap. This allows for structural movement without sacrificing the visual line.
Along straight walls, secure the interlocking rubber tiles for garage at the seams rather than the centre. This preserves the flexibility of the system while preventing lateral creep. Use a rubber mallet to seat the connectors fully.
The process is methodical:
Each row follows the last without forcing the material to conform to the frame. The finished edge stays true, and the interlocking rubber tiles for garage remain stable where foot traffic and vehicle movement are heaviest.
Final Inspection and Adjustments
The last ten minutes of an installation reveal its true character. I always walk the floor on my knees, palms flat against the surface, feeling for subtle shifts. It is a ritual that has saved me from countless redo jobs.
First, I check every seam by hand. A tile that sits proud will catch a heel or a tyre edge. I press down firmly along each connector. If I feel a click or a wobble, I lift the tile and reseat it with a firm tap from the rubber mallet.
Then, I inspect the perimeter gaps. The interlocking rubber tiles for garage need room to breathe. I use a metal rule to confirm the expansion space remains uniform, adjusting where the wall bows.
– Run a straightedge diagonally across the field.
– Look for low spots that collect water.
– Roll a small ball across the surface to test for dips.
These adjustments take minutes but decide the floor’s lifespan. I also check that door thresholds sit above the tile line, allowing for the extra height. A quick visual sweep for debris under the connectors, and the job is done. The interlocking rubber tiles for garage now form a single, silent skin over the concrete, ready for whatever rolls or drops next.
Maintenance and Longevity Tips
Routine Cleaning and Debris Removal
A single grain of sand can sit beneath a tire for years, grinding away the surface every time you pull in. That is why routine cleaning matters as much as the installation itself. For interlocking rubber tiles for garage, debris acts as an abrasive, breaking down the binder that keeps the rubber supple. I recommend a weekly sweep and a monthly damp mop with mild soap. Here is a simple rhythm:
– Sweep or use a leaf blower to lift loose dust and pebbles
– Damp mop with a pH-neutral cleaner, avoiding harsh solvents
– Rinse with clean water and dry the surface to prevent slippery film
Do not ignore the seams. Crumbs and fine dirt collect there, trapping moisture that can cause mold. A quick vacuum along the edges every few weeks keeps the tiles looking new. Over time, the sun and temperature shifts may harden the rubber, but consistent cleaning delays that process. The goal is not perfection; it is preserving the material’s resilience.
Dealing with Stains and Spills
A spill on interlocking rubber tiles for garage is a matter of timing. The moment a can of oil tips over, the rubber surface offers a brief window for a clean wipe. Wipe it up then, and the porous resilience of the material wins. Let it dry, and the stain pushes deeper with every passing hour. The secret is not aggressive scrubbing. Use a soft brush, warm water, and a degreaser. Blot, never rub. Rubbing forces the stain into the texture of the tile.
Garage life invites substances that leave marks: rust, brake fluid, spilled paint thinner. Those require attention beyond the ordinary.
- Absorb the excess with a dry cloth or absorbent clay.
- Apply a solvent appropriate for the spill, testing on a small area first.
- Rinse thoroughly and allow the surface to dry completely.
Interlocking rubber tiles for garage reward those who address spills quickly, and stains that remain are warnings about postponed action.
Preventing Indentations from Heavy Loads
Even a resilient floor has a threshold. A heavy lift or a stack of lead ingots, left for months, can press permanent dimples into interlocking rubber tiles for garage. The material needs time to recover its cellular memory, and constant pressure steals that chance.
Examine the contact points. Jacks, tool chests, and engine blocks concentrate force into small footprints. Spread that force with a sheet of thick plywood or a load-spreading pad. For anything stationary for more than a week, rotate the equipment a few centimetres when you clean the garage. Follow this sequence:
- Inspect the floor for existing indentations first.
- Place a rigid barrier under each heavy item.
- Shift stationary loads monthly to vary the stress points.
This routine works because interlocking rubber tiles for garage rely on elasticity, not thickness alone.
Cost Analysis and Alternatives
Average Price Range per Square Foot
Every garage floor shows its age in scuffs and oil. For homeowners in South Africa, the average price per square foot for interlocking rubber tiles for garage ranges from R110 to R260. Thickness and polymer content drive the cost. Epoxy finishes need strict moisture control and crack repairs, while foam mats collapse under car jacks. Rubber tiles spread weight evenly and can be lifted for cleaning or relocation.
Consider the main price factors:
- Material grade: recycled rubber costs less than virgin EPDM.
- Pattern: coin top versus diamond plate changes mold costs.
- Thickness: 10 mm tiles sit below the price of 20 mm tiles.
A mid range tile at R180 per square foot often outlasts two epoxy coats. That makes the outlay a tactical decision, not a sunk cost.
Comparing to Epoxy Flooring and Mats
When comparing long term value, interlocking rubber tiles for garage often surprise homeowners. A single epoxy coat may appear cheaper upfront, but it fails under hot tire pickup and needs recoating every few years. Foam mats compress permanently. Rubber tiles, by contrast, spread point loads and lift for cleaning.
- Surface preparation for epoxy includes grinding and moisture testing.
- Repairing cracks before application adds time and expense.
- Removing epoxy later is labor intensive.
These factors change the calculation. In South African conditions, where heat accelerates epoxy degradation, these tiles become the pragmatic choice. They are a tactical asset, not a decoration.
Long-Term Savings and Warranty
Ask any garage floor what it thinks of a R2,000 epoxy coating, and you will get a silent, oily shrug. The upfront cost of interlocking rubber tiles for garage floors is higher, but the price tag stops being scary when you factor in the recurring expenses of the alternatives. A cheap repair followed by a full replacement is not a bargain; it is a hobby.
Consider the true cost of ownership, which is a phrase that sounds boring until you see it on a spreadsheet.
– Epoxy requires surface grinding and moisture testing before installation.
– Cracks must be repaired, adding labour charges.
– Professional recoating is needed every few years, especially under the South African sun.
Rubber tiles eliminate these recurring bills. The long-term savings come from durability and the fact that you can lift a damaged tile and replace it for the cost of a single tile, not the entire floor. The warranty is also a quiet genius. Most manufacturers offer a 5 to 10 year warranty against manufacturing defects, which is a guarantee that your tiles will not turn to dust while you are still paying off the bakkie parked on them. That is the kind of formal promise epoxy refuses to make. It is a simple equation: pay once, or pay forever, and the tiles win on a technicality. They do not need a fancy certificate; they just need to sit there and take the abuse, which they do with a level of stoicism that would make a doberman jealous. The warranty is the only paperwork you will ever need to read about this floor, and it reads better than a bank statement. Just remember to keep the receipt in a dry place, perhaps in the glovebox, next to the owner’s manual you never open. It is the financial peace of mind that comes with knowing your floor is legally obligated to behave itself. And if it does not, you have the paperwork to prove it. Now that is a beautiful thing, and it does not require a single coat of resin to achieve. Just a tile that is unafraid to wear a top hat and bowtie to your garage, because it knows it is going to the ball. It is the only investment that gets better with age, like a fine wine, or a stubborn mule. It just keeps going, and going, and going, until you decide to move house and take it with you, because it is that good. And that is a statement you will never hear about epoxy. Not once. Not ever.
DIY Installation vs. Professional Help
The cheapest quote is rarely the cheapest floor. When comparing interlocking rubber tiles for garage, the real cost splits into materials and labour. DIY installation removes the labour line entirely. The tiles click together without adhesive, so a standard double garage can be finished in a single weekend. Professional help only makes sense for massive areas or unusual layouts. I have seen quotes double just for prep work. The alternatives fail this test. Epoxy demands surface preparation, moisture checks, and recoating cycles. Mats shift and trap debris. A quick cost breakdown makes the decision obvious:
– Tile price per square metre
– Transport fees
– Edge trimming tools
– No adhesive, primer, or sealant
That last line is where the savings accumulate. The numbers favour the DIY route, and the result looks professionally installed.
Environmental and Disposal Considerations
South Africa produces roughly 11 million waste tyres annually, and only a fraction re-enter manufacturing. Interlocking rubber tiles for garage floors are often compounded from that recycled crumb, which shortens the waste chain and spares virgin polymer extraction. That environmental benefit carries a measurable cost advantage over time. Cheap mats shed fibres and fail within two wet seasons; epoxy requires chemical stripping every five years. Neither leaves a clean exit strategy.
Disposal of rubber tiles is straightforward. Because the material is inert and non hazardous, municipal waste sites accept it without special handling. Alternatives leave residue and require professional remediation. Practical end of life routes include:
- Recycling through crumb rubber reclamation programs
- Donation to equestrian arenas for arena footing
- General waste disposal at municipal sites
Each route avoids the toxic by-products associated with coating removal.


0 Comments